How to Optimize Photos, Videos and Audio Files for Casting Networks
Casting Networks recently updated the way media is stored to a flexible model that is based on gigabytes. This is a big change that will affect how you think about media uploads. With that in mind, we’ve put together a guide to optimizing media, along with recommendations for some free and cheap tools that you can use to make sure you’re getting the absolute most out of your media storage.
It’s only natural to want to upload photos, video and audio in the highest quality format that’s available. This is an industry that lives and dies on its production values, after all! But your account’s media storage capacity is finite – Premium members get 3.5 GB (currently unrestricted), Essential members have 1 GB and Free members have 350 MB – so it’s a good idea to optimize the files you upload to use as little space as possible and ensure that you’re able to upload everything you need.
As you read through this guide, keep in mind that when it comes to your media file, casting directors only need two things:
- Files that load fast
- Quality that is good enough to see, watch and hear you
That’s it! Your photo files don’t need to be billboard-ready, your videos don’t need to be cinema-quality, and your audio doesn’t need to be pristine. They only need to be good enough to show what you can do. Why waste all that media storage space on something the casting team doesn’t need?
TL;DR: Best practices for media optimization
To get the most out of your Casting Networks media storage, optimize your media files so that they take up less space while still looking and sounding great:
- Photos: Resize images and save them as JPGs. If you have access to tools that allow it, reduce the file quality from Very High (100%) to High (60%).
- Video: Reduce high-resolution videos to 720p and use MP4 or AVI, whichever your device natively supports.
- Audio: MP3 is fine for most audio to save space, and free compression tools can help slim files down even further.
We also recommend consulting our support page How Much Media Can I Upload? for additional information about different file types and sizes for Casting Networks media storage.
Some important editing tips before we start
If you’re new to editing media, there are some basic ground rules we strongly recommend following.
Never edit your originals.
Always make a backup of the full-size, full-detail file that never gets edited. All editing should be done on a copy, ideally kept in a completely different folder so that you never accidentally overwrite the backup.
Trust your eyes and ears to gauge quality.
Always look at, watch and listen to your files after optimizing them to make sure they really are good enough. We give some specific numbers in our advice below, but these should be treated as suggestions rather than as unbreakable rules. For example, if you reduce your image quality to 60% and it looks like junk, then adjust that quality number up until you get a result you’re happy with.
Click on a link to jump to that section:
Photo Optimization Tips
The first step to optimizing your photos is to know what you’ve got. Things that you’ll need to know include whether it’s a JPG or a PNG, the file size in MB or GB, pixel dimensions and DPI. How you find this information depends on what kind of device and operating system you’re using.
How to find photo properties with a Mac desktop
1. Open the photo in Preview
2. Select Tools from the menu bar
3. Click on Show Inspector to see file format, file size, dimensions and DPI
How to find photo properties with a Windows PC
1. Locate the image in the folder where you’ve saved it
2. Right-click on the file’s icon
3. Select Properties to see file info
How to find photo properties on a mobile device
The easiest way that we’ve found is to use a free metadata viewer like Exif.tools, which lets you browse for a photo saved on your device or drop in an image URL to see its metadata.
Now that you’ve gathered some information about your photo file’s properties, let’s dive into our recommendations on how to optimize it.
Save your photo as a JPG.
Most photo files you encounter are JPG (or sometimes .jpeg) or PNG. The difference between these file types boils down to “lossy” versus “lossless” data compression. The simplest way to explain it is that JPG is “lossy” because it prioritizes data compression over quality, while PNG uses a different compression method to preserve image quality.
We’re talking about media optimization, so we’re looking for the best combination of compression and quality, and JPG has the edge here. Don’t let the “lossy” format scare you. JPG files compress into a smaller number of GB, and frankly, most web images – including your headshots – don’t need to be ultra-high quality to look great. PNGs tend to take up a little more space.
Reduce the dimensions to 1,000 px wide.
There is not a single image on the web that needs to be 5,000 pixels wide, and more pixels add up to larger files. An easy way to reduce those GBs? Resize your photos to a maximum width of 1,000 px. Just make sure that the “Constrain Proportions” box is checked if you’re using Photoshop to maintain the aspect ratio so that the image doesn’t look squeezed.
Make sure the DPI is set to 72.
What is DPI, anyway?
DPI is used to measure image resolution. The acronym stands for “dots per inch,” which is an old print concept that found its way into digital and internet images. If you’re printing an image, then you want to print 300 dots per inch to achieve a high-quality image, but the standard for web display is just 72 DPI. A monitor or phone screen can’t display 300 DPI very well, and the extra data results in an image that shows up extra-large or loads extra slowly, and often both.
Most photographers today should be providing you with photos in both print-friendly and web-friendly formats, but it’s a good idea to check that you have both on hand. Not only is 300 DPI massive overkill for anything you’re putting into your Casting Networks profile, but all that extra DPI will take up unnecessary space in your media storage.
How to change a photo’s DPI
If you have access to Photoshop or Photoshop Elements, then you can do this by going to Image > Image Size, and then changing the Resolution field to 72. A tip for adjusting resolution is to do that before adjusting your pixel height and width since reducing the resolution will also change the dimensions.
If you don’t have Photoshop, try uploading the file to a free photo editing tool like Canva, then export it and check the DPI on the new file. We got the DPI of our test photo down from 300 to 96 using this method. It’s still not 72, but 96 is a much better number than 300 for optimization purposes, and it’s a free alternative to Photoshop.
Adjust the image quality and metadata
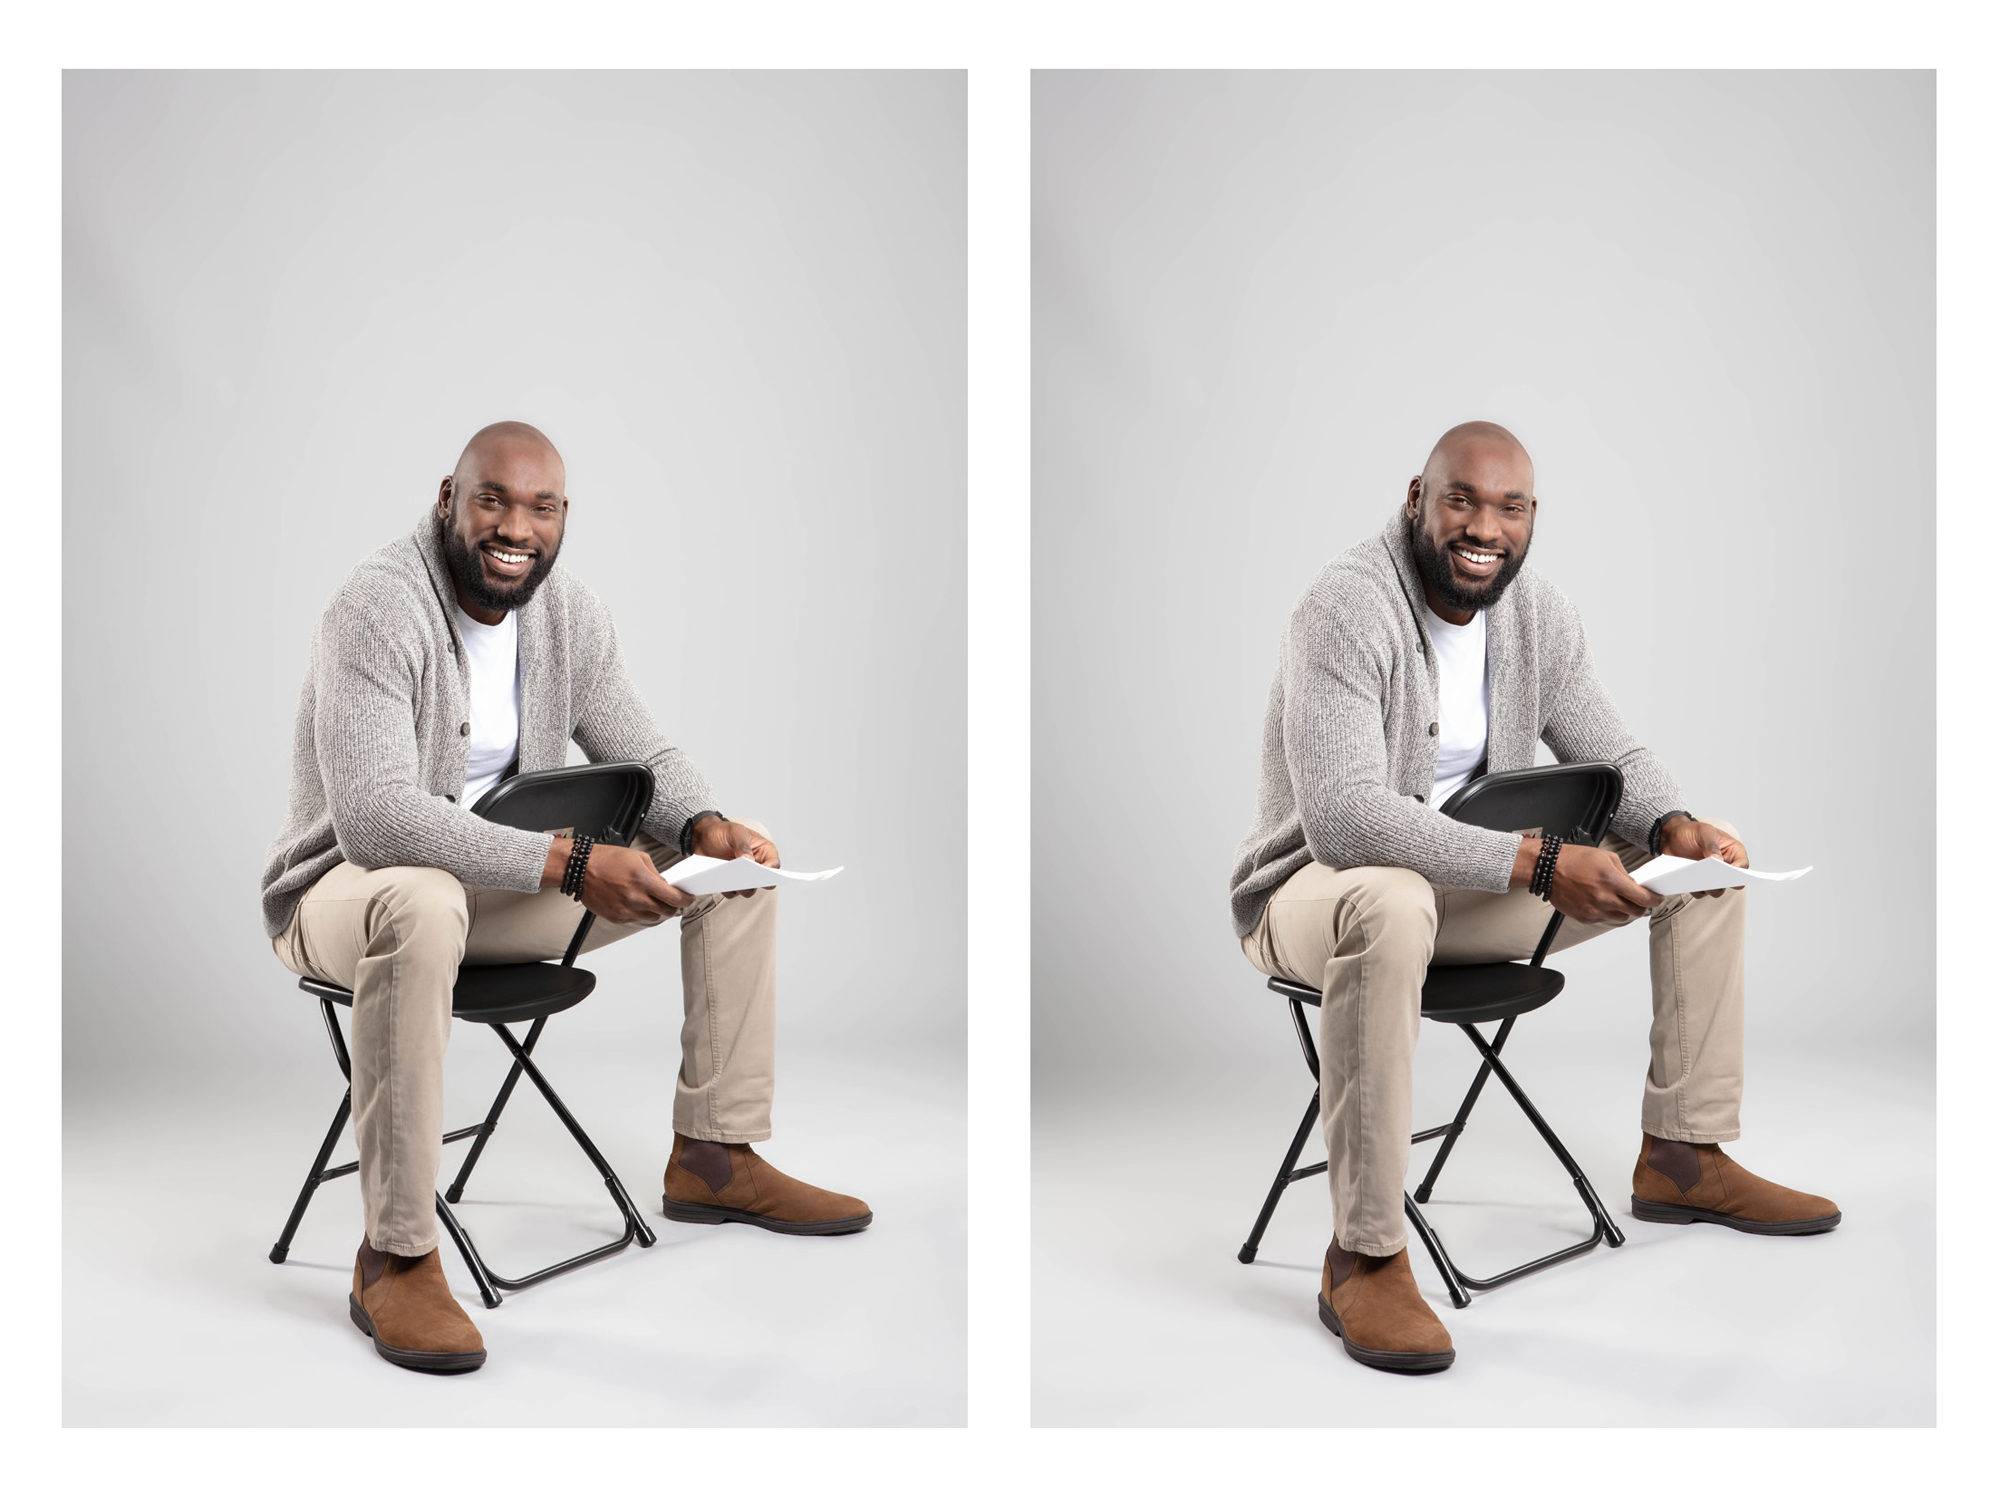
Photoshop users can use the Save for Web function to select JPG as the file type and optimize image quality for a smaller file size. Don’t be afraid to nudge the quality down to 60%. If your eyes can’t see the difference between a file saved at 60% versus 100%, then go with 60% to save some space.
Here’s an example of the same photo saved at 60% quality versus 100% quality. Can you tell which is which?
One extra note about Save for Web is that it also automatically strips the metadata from your images, which slims the file down even further without sacrificing image quality.
We’ve mentioned Photoshop twice now, so it’s a good time to point out that there’s no need to splash out for the full Adobe suite. Photoshop Elements is much easier on the budget and does everything you will ever need for a headshot photo – and then some. You can often find it discounted to $59 during common sale periods throughout the year.
For those looking for a free option that can handle some of these suggestions, check out Canva or Kraken.io, both of which offer some free basic photo editing tools.
Multiple members of our team also like Photoshop Express, which is available for mobile devices on both iOS and Android. The free version allows resizing in addition to an impressive suite of features, but you’ll need to upgrade ($35/year or just under $3/month) to adjust image quality.
Video Optimization Tips
Videos can eat up a ton of media storage, so it’s critically important to make sure they’re as optimized as possible before you hit the Upload button.
Convert MOV files to MP4 or AVI.
When you’re dealing with video files, they’re usually going to be in one of three formats:
- MP4 – the format used by iOS
- AVI – the format used by Windows
- MOV – a high-detail format commonly used for TV and web series
MOV is a higher-quality format, but more detail and higher quality equates to large files. And MP4 and AVI are not exactly junk – most smartphone videos will be one of those two, so chances are good that you’re already using them for media requests. If it’s good enough for TikTok, then it’s good enough for a self tape.
There’s no advantage to one over the other, so whichever your tool or device of choice offers will be fine.
Reduce high-res videos to 720p and compress the file.
The new SAG-AFTRA agreement stipulates that 720p is the highest resolution that a casting director can require for self tapes. There’s little incentive to upload anything that’s of higher quality.
The easiest way to ensure you’re uploading video in 720p is to film it in 720p to begin with. Check the default settings on your phone or video equipment and adjust it if needed.
But if the video in question is at 1080p or higher, then there are some free tools you can use to convert it to a lower resolution and compress the file size at the same time:
- Mac – QuickTime
- Windows – Video Editor
- Freeconvert.com
- HandBrake
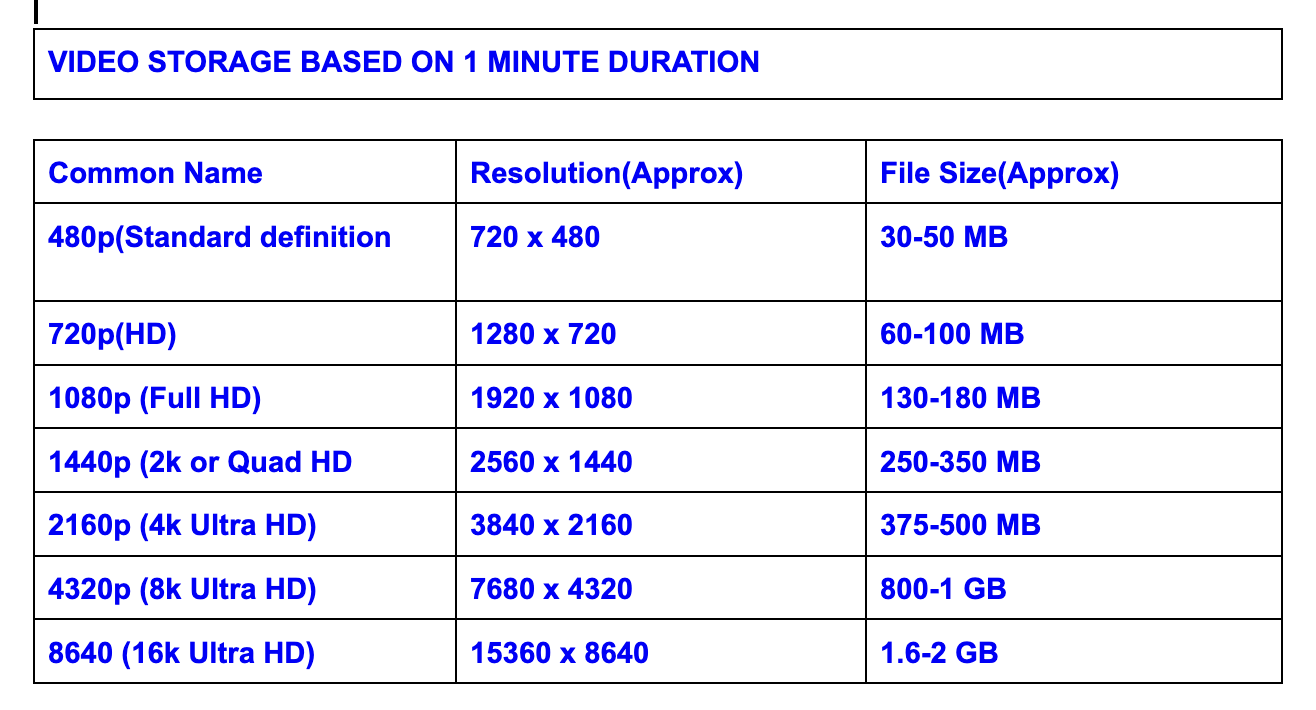
How much of a difference can video quality and compression make? Check out this chart from our support page about media file sizes. One minute of video at 1080p can use up to 180 MB, while a video at 720p can use up to 100 MB per minute, a difference of 80 MB.
If saving 80 MB doesn’t seem like much, think of it this way: For five minutes of video, that adds up to a difference of up to 400 MB. Five minutes of 1080p video takes up about the same amount of space as nine minutes of 720p video. That’s four additional minutes of video that you can use for reels or self tapes!*
* The size of a media file can vary significantly depending on multiple factors.
For more detailed information and instructions on video compression, we like this tutorial from Vimeo.
Audio Optimization Tips
The last media type that we’ll cover here is audio files. The most common formats are MP3 and WAV.
Convert WAV files to MP3
WAV is a higher-quality format, but MP3 is a smaller file. If you’re old enough to remember the heyday of MP3s and iPods, you already know that this format is high-quality enough to show off your voice-over work, musical ability or podcast appearances.
Compress the size for a smaller audio file
Similar to photos and videos, we recommend running your audio files through a compression tool to reduce file size. Our team recommended a pair of free tools that can help:
Do you still need more media storage? Upgrade to an Essential or Premium membership today.
You may also like:
- How Much Media Can I Upload? File sizes explained.
- What’s the difference between 720p, 1080p, and 4K video?
- Guidelines for Swapping Media