Project Creators: Here’s How to Get Self Tapes from Actors
If you’ve been building a schedule for your project but have had difficulty obtaining self tapes from your actors, it’s tough trying to move your work forward. Your actors may not know that you wanted self tape auditions or know where to send them. We’re here to help. Here’s why you haven’t been able to receive self tapes and how to make sure you get them every time.
How can I receive self tapes?
Most times when a project creator is experiencing trouble with receiving self tapes, we’ve found that it’s due to a missing Media Request. Types of media that you can ask for include photos, videos, audio and PDF files. Because the required media has not been communicated in the project, interested performers won’t know how you’d like them to audition or will be unable to send their auditions anywhere.
In order to receive your self tapes and move your project forward, you should inform your actors that you’d like them to submit a self tape audition using a Media Request. Once performers have submitted self tapes by responding to your Media Requests, you’ll be able to receive, share and submit self tapes for casting to review.
How do I create a Media Request?
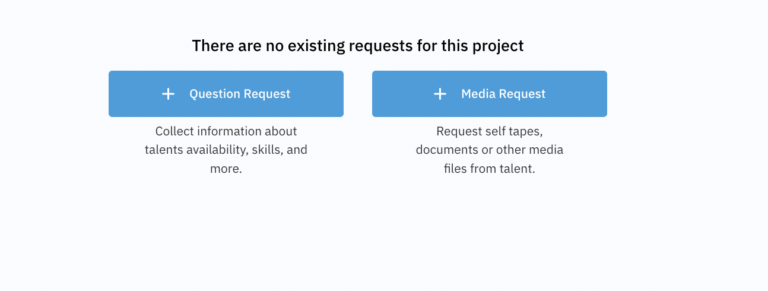
When creating your project, a prompt will come up asking you if you would like to create a Question Request or a Media Request. Select the Media Request button and it will take you to the appropriate section.
Once you’re in, name your request and then choose which media you would like your performers to provide. For self tapes, check the “Video” and “Photo” boxes. Be sure to include instructions for your actors, such as “please read the sides and also send a current selfie.”
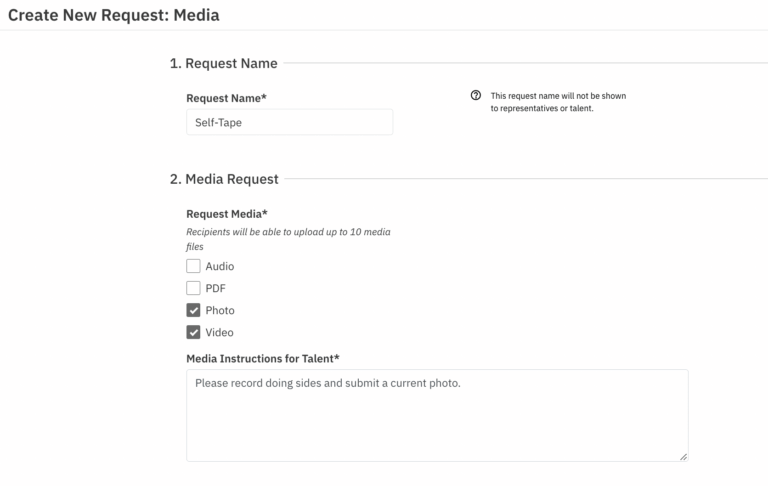
Once that’s done make sure that you check the “Allow Additional Media” button. This lets actors send extra items after they have sent media your way, or replace media they have already sent (for example, a new headshot).
If you have attached sides to your roles which you would like talent to see when receiving the media request, make sure to check off “Include Sides.” Otherwise your performers won’t know what to do when recording their self tapes.
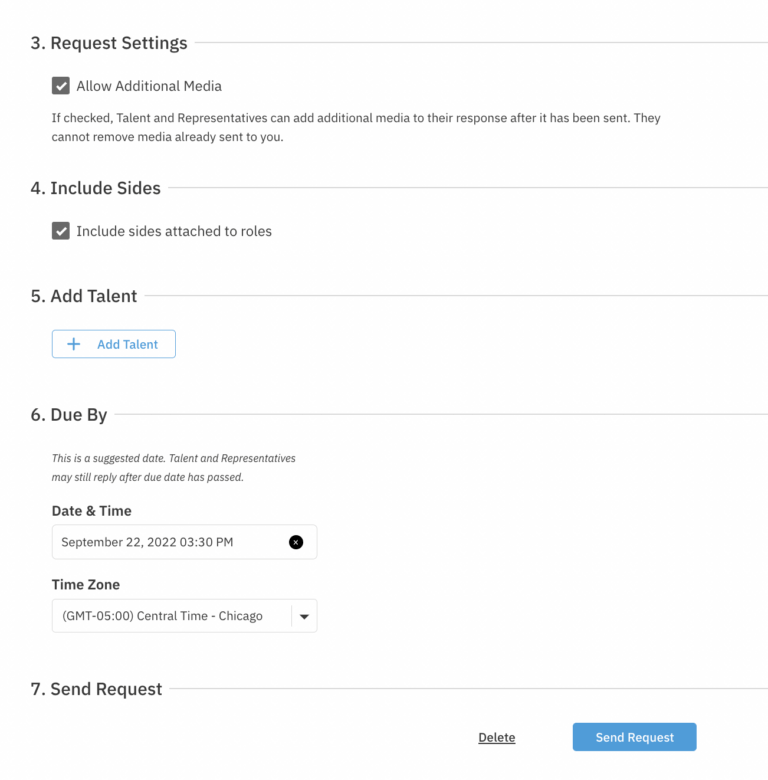
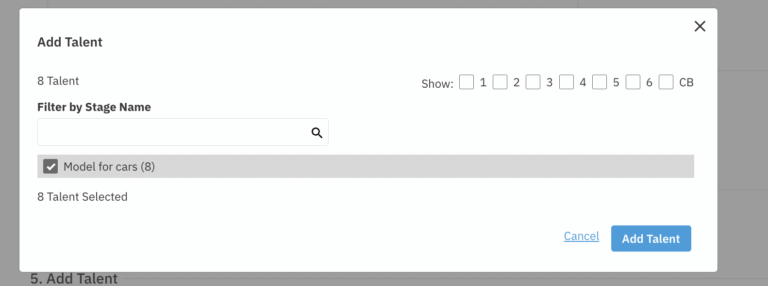
Next add your actors that you’d like to have your request sent to in the “Add Talent” box. Then provide a date and time that you’d like your self tapes to be sent by.
Once you’re satisfied with your Media Request, hit “Send” and you should be able to start receiving self tapes and other media you asked for.
Remember: Once you submit your project you cannot go back and change anything, so if you forget to request self tapes or add sides to your Media Request once the project is live, you may have to delete it and create a new one. If you forgot to include sides on the roles – you can also put them in a google drive and paste the shareable link in the media instructions.
How will I know it worked?
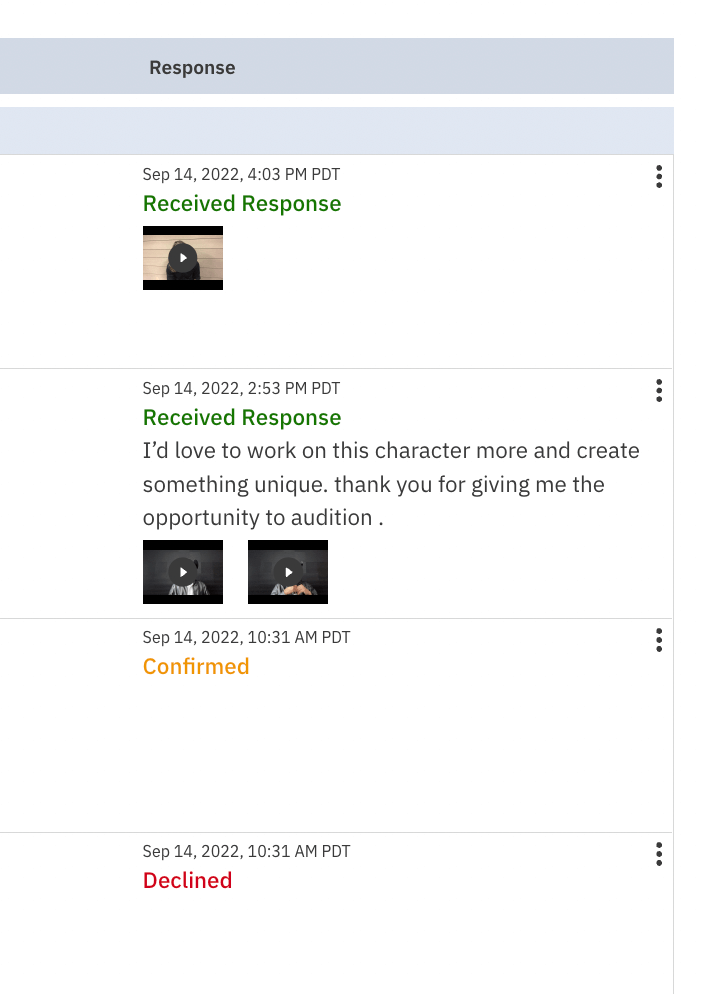
After you send your Media Request to the thespians you’d like to audition for your project, self tapes will appear on the actual request that you sent. When you return to your request, self tapes will appear as responses on the right hand side in green with the video for you to view. You can also click the download button to store the self tapes on your computer.
The right hand side will also show actors who have confirmed or declined to submit to your project. Confirmed actors are those who have agreed to submit their self tapes but have not yet done so.
Now that you know how to create media requests, it’s time to put your best foot forward so you can get your projects on the right track and more importantly, see your actors’ self tapes roll in.
Sign up or log in to Casting Networks to review your actors’ self tape auditions now!
Related articles:
What to Ask For in a Self Tape
A Beginner’s Guide to Self Tapes
How to Use Casting Networks to Find Talent That Are Perfect for Your Project


